
7 Common Mistakes When Building Your Sauna Room
Gosh! We’ve all done it. Rush something forward without really thinking it through. At Cedarbrook Sauna + Steam, we’ve been building saunas since 1971! So take a look at this list of mistakes you can easily avoid.
TIP #1 Did NOT Add Sauna Vents
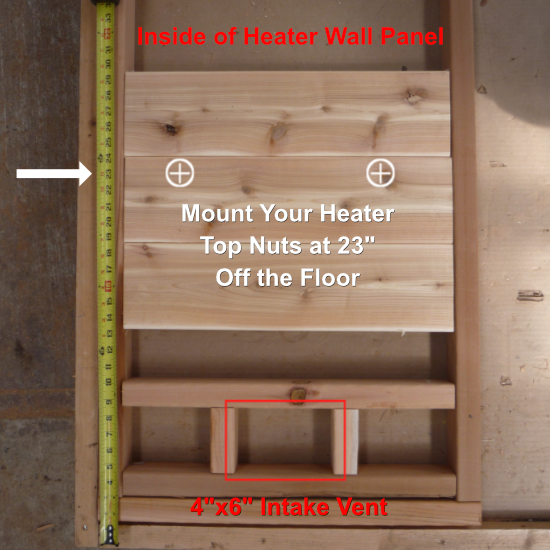
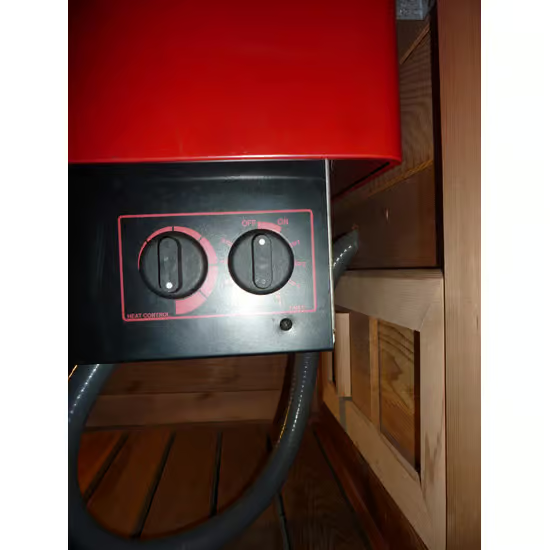
Sauna heaters are an appliance requiring air flow. First and foremost, sauna heaters heat air. Sounds correct … lol. So where does this air come from? Heat rises, so heating new air gets harder the more it rises, thus the appliance requires a source of air to continue: An intake vent. Usually intake vents are within 3 feet of the heater. In small saunas, the heater is often near the door. So you can vent under the door with a 1/2″ gap. Useful if you’d rather avoid cutting into walls (adding blocking, trim work, etc.). Sauna heater manufacturers do provide appliance requirements. Worth reading before you put wires in the walls and cover them up — that’s why we’re here for ya!
Of course for an appliance to draw air and create flow, some air must leave too. Thus an exit vent. Ideally far away from the intake vent, never directly above your heater and placed about 6 inches below the ceiling — Never on the ceiling either. Air should exit into an adjacent space or be channeled up into an attic. Never into a wall cavity. This could create mold. And also better not to the outside, as air flow can reverse. That’s why we offer sliding door vents. These come in 4×6″ sliding door vent (<9kW heaters) and 6×8″ sliding door vent (9kW+ heaters). Some large or dual heater scenarios require multiple vents.
Trumpkin sauna design uses mechanized venting. Trumpkin saunas offer mechanized venting to better create the loyly pocket of rolling heat. These are great. In the end, the point is to sweat. And you will quickly in saunas above 135 degrees — no doubt. The real question is how long do you want to stay in the sauna? You can linger on a LOW bench for a long time and breathe warm air (90-120°F). However in a Trumpkin sauna design, there really is NO LOW bench (typically 18-20″ off the floor) is really only just a step to get to the MID benches (36-40″ off the floor) or the HIGH benches (54-60″ off the floor). And can feel like a jungle gym. See the Trumpkin design and concepts here from the creator.
What happens when you don’t add sauna vents? If your sauna is wood-fired, your heater will never cut out but it may use the oxygen you prefer to breath. However, electric sauna heaters thermostatically regulate themselves. When they heat hot air again and again, they think they’re getting too hot and may turn off prematurely. The height of the sensor will also affect how well they work.
TIP #2 Did NOT Use Sauna Foil Vapor Barrier or Insulate
The principle of sauna is a simple. I build a room, insulate it to contain the heat and enjoy. Out of that experimentation better conditions have come into use.
-
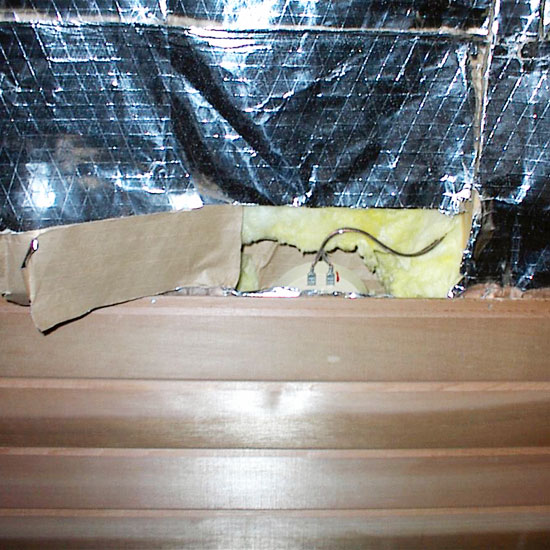
Sauna foil exposed with speaker Tongue and Groove cedar wood paneling — cedar is all we use. Cedar is a superior material. Highly porous and quickly cools to your body temperature or warms to your body. Always use clear cedar. If you sit or lean against a knot, you will get scorched.
- Sauna foil vapor barrier. It is very effective at reflective insulation or as conductive insulation as well. Do not substitute with plastic sheeting like Tyvek or Visqueen. These are meant for outdoor waterproofing purposes, not heat containment. In time, you will notice odd odors, as well as off-gassing. Conductive insulation means that there is a small gap between the foil and the cedar paneling. This allows the heat to move freely behind the walls and creates a more even distribution.
- Wall batting insulation. We use for formaldehyde-free insulation batting in the walls. Rock wool is based on silicone and is brown but the pink stuff is OK. It is really essential to help preserve heat in the sauna and should never be skipped. And just like a house, you should build your sauna wall studs at 16 inches on center.
TIP #3 Did NOT Maximize Sauna Walls Per the Lumber Foot Available
If you have flexibility to build your walls at any dimension, read on. You should build your sauna per the lumber feet you have available. What am I really asking of you here? Well, I’m going to tell you how to maximize your sauna space without cutting or trimming your paneling at all or minimally.
I’m going to come out this from the reverse side because it always makes sense the first time. If you are building a 4 x 6′ sauna because you have a lot of 4′ and 6′ boards. And you put your wall studs at exactly 4 feet and 6 feet apart. And you put the short boards on the end walls (3/4″ thick x 4 ft) because they fit perfectly. Well now you must trim one and a half inches off your 6 ft boards to make them fit. Now, the dimensions of your sauna’s useable space is exactly 3′ 10 1/2″ x 5′ 10 1/2″. Adding 3/4″ material to two sides has effectively reduce your sauna by 1 1/2″. In a big sauna, no big deal, but in a small sauna, you’ll notice especially if you’re 6 ft tall and want to lay down comfortably.
The better strategy is to set your studs at 4′ 1 1/2″ x 6′ 1 1/2″. And now when adding 3/4″ material to all walls, you’ll end up with exactly a 4 x 6′ usable sauna space. Eureka!
However, not quite good enough … Remember we still want the the pre-built 4ft and 6ft benches to fit easily. So, I’m going to tell you to add at least one more 1/8th” as a gap to these calculations. Why? With that extra 1/8″, your sauna bench will drop in perfectly without scratching the soft cedar. Indeed, very soft so be very careful with tools, especially on your hip. So yes, when you order a 4×6 sauna materials package from us, you should build your walls at 4′ 1 5/8″ x 6′ 1 5/8″. You’ll have less cuts and a bigger sauna for the material you bought.
To maximize the useable space in your sauna, center the board on the wall leaving roughly 3/4″ at each end. This will not be noticeable because you will use 1×1″ on corner seams or 1×2″ trim on ceiling/floor seams to cover all corner gaps.
TIP #4 Too Much Glass / Glass is a Heat Sink
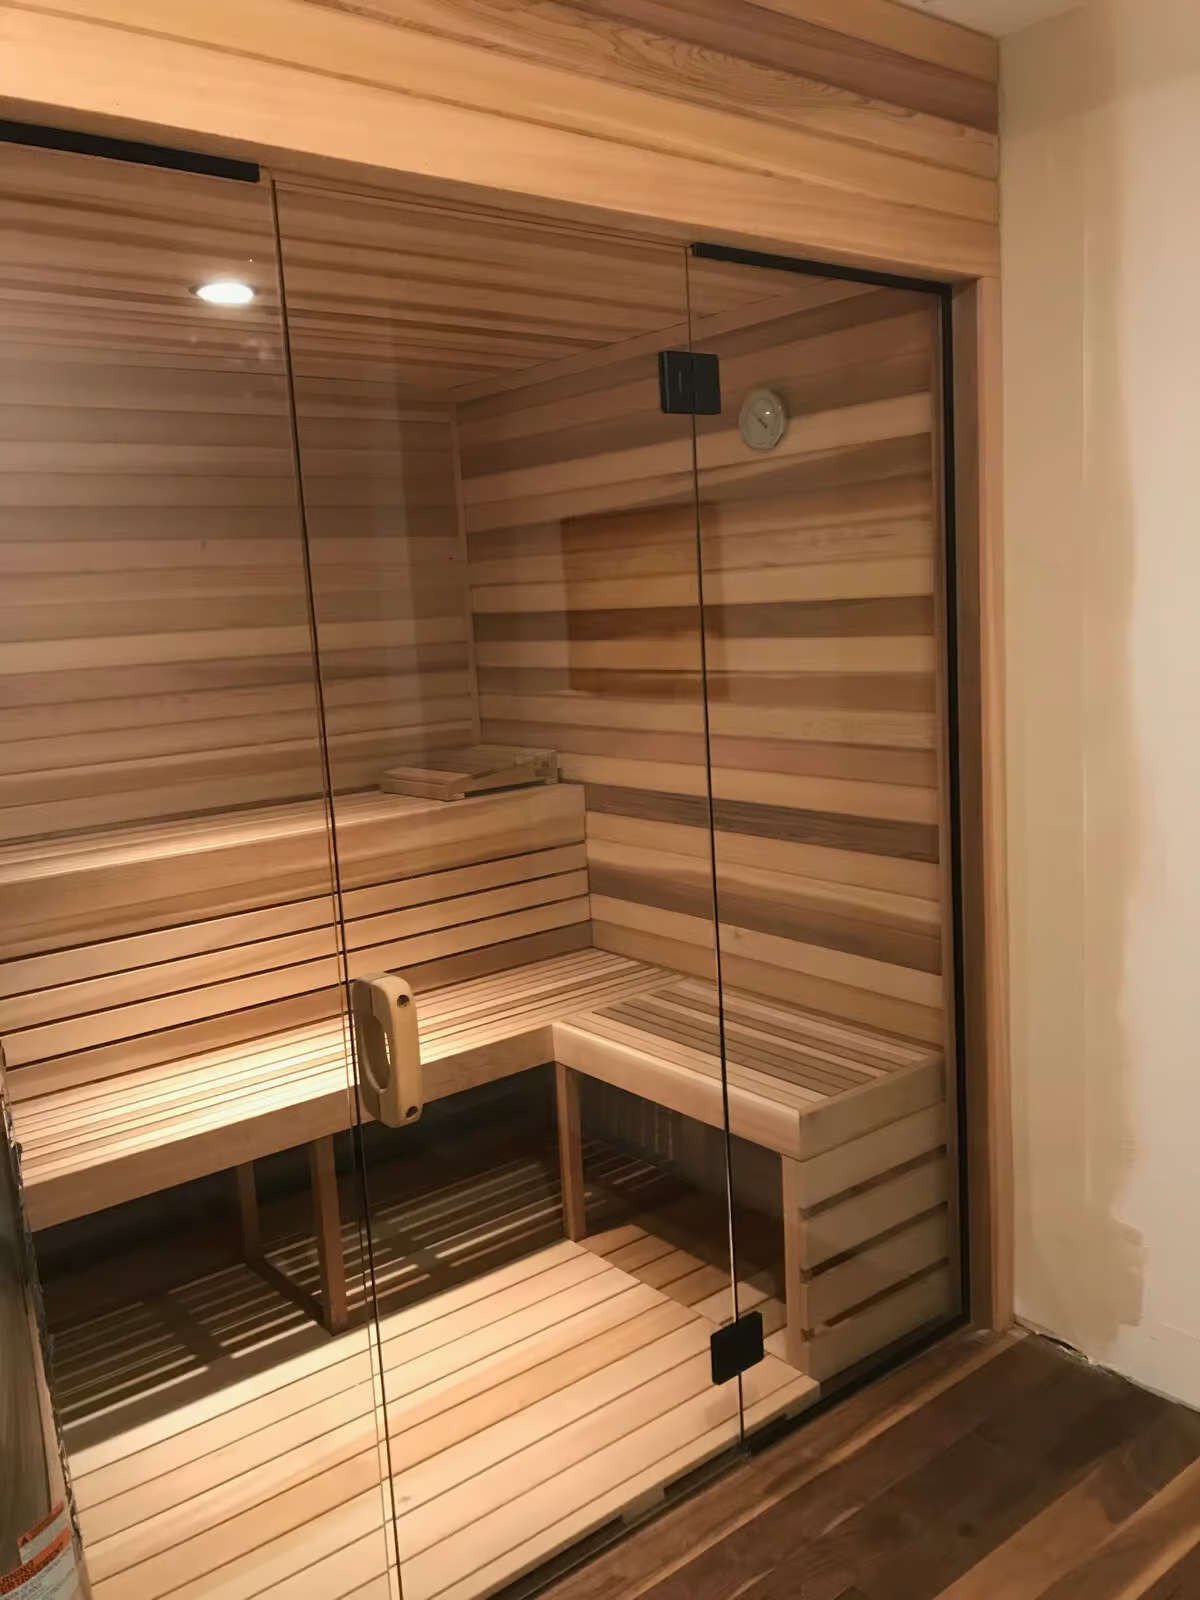 Glass is beautiful. Especially on your sauna front wall. It is very inviting and you’ll probably use the sauna more often. Just seeing that beautiful cedar or your sweetheart through the glass will make you want to enjoy the heat together. However, glass is a heat sink. It is cold to the touch and it must be warmed almost continually. So your heater will use more energy. But most people did not factor the extra capacity required when building such a sauna with a glass wall.
The Glass Rule. The rule of thumb is for every 10 sq. ft. of glass it in affect adds 50 cu. ft. of air that your sauna heater must heat. So if you do the math on a 4 x 6 x 7 sauna = 168 cubic feet. Well now if you add a 6 x 7 front wall of glass. That is 42 sq ft. of glass = an extra 210 cu ft. of volume to your sauna. That will require that you upgrade your heater. So clearly if you add wire without thinking through this design, you may end up with a heater under powered for your sauna condition, so you’ll have a heater working too hard. It may burn out. It may create an electrical hazard or even a fire. Something that could have easily been avoided.
TIP #5 Avoid Complicated WiF-enabled Heaters / Analog Controls Last
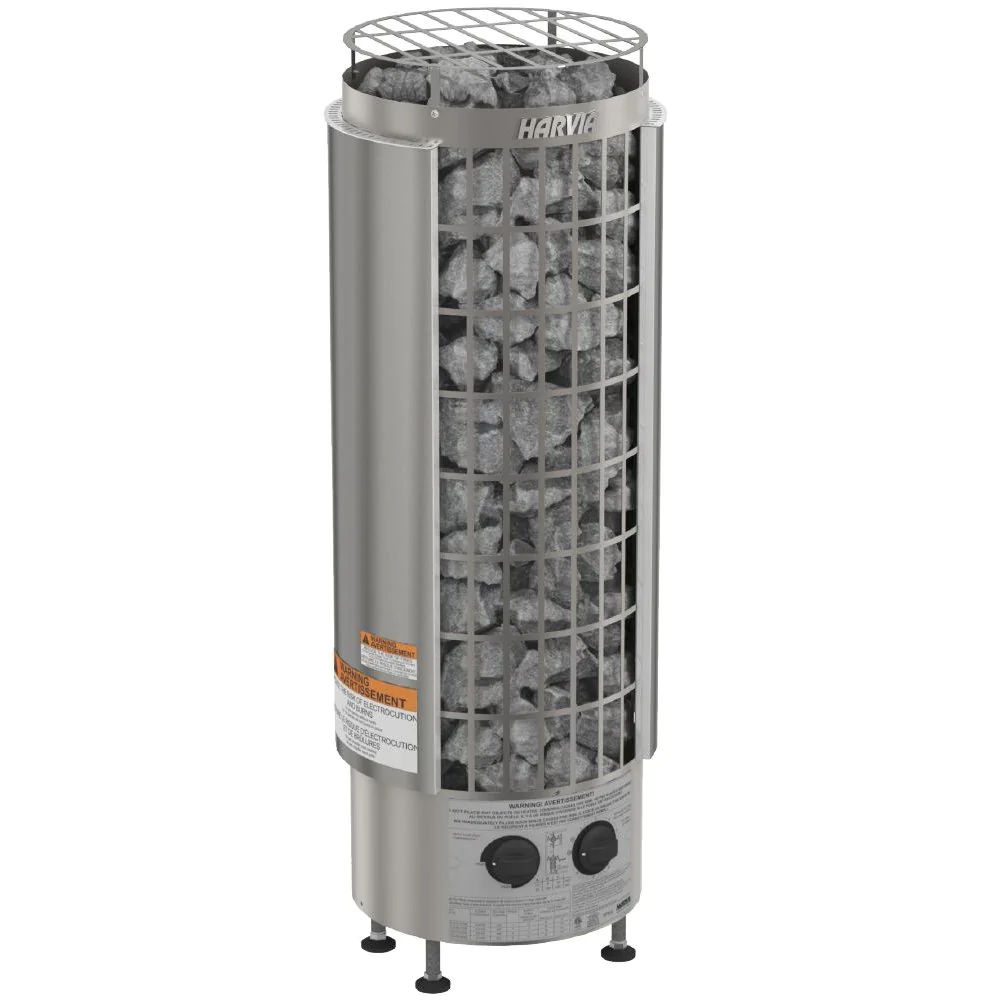
At Cedarbrook Sauna and steam, we sell solutions. We’ve had many more success stories with heaters with built-in controls than any other — 50 years worth! These types of heaters are super easy to wire, and they just work for a long time. We are well aware that people like digital controls. But these do add a level of complexity that may have you tearing your hair out later OR paying your electrician to wire an appliance they’ve never work on before.
Why Choose a Sauna Heater with Built-in Controls?
- Long Lasting — Our experience is it’s often 10 years before any parts need replacing
- Cost — It’s the cheaper option, no doubt
- Easy to Wire — Simple for an electrician; only 4 wires (2 hots, neutral and ground)
- Failure Rate — Low. Digital controls involve motherboards which are sensitive to other conditions. We do like analog controls on the wall too
- Easy to Diagnose — If you buy a digital WiFi-controlled heater and something goes wrong, we can’t diagnose it. There are simply too many factors. So if under warranty, we’ll refer you to the distributor with better technicians and tools
TIP #6 Ceiling is Too High / Overworked Heater
Most sauna heaters for residential applications are built for a 7 foot ceiling. You can go as high as 8 ft but remember all saunas heat from the top down. Sauna heaters are rated for a 6′ 4″ to 8′ application. Anything above or below this will compromise the heater eventually (elements will burn out). Or your room will not get hot enough or create a fire hazard.
Never build a sauna thinking a 10 ft ceiling is going to work. You must lower the ceiling in the range: 6′ 4″ to 8′ for 8kW and below. Your sauna will be more efficient and you’ll save on utilities. If you need high ceilings, you must upgrade your heater which means more electrical power and a larger breaker on your electrical panel.
Hot yoga in the sauna or workouts are now a popular request. By placing your sauna benches on the ledges instead of fixed legs, it’ll allow you to flip up benches or slide them out of the way. So, you can use your sauna as an exercise room too. But keep in mind the floor will still be cool — roughly equal to the ambient temperature of the floor. If you need a warm floor, then you’ll need to add an electrical radiant floor or pipe in hot water.
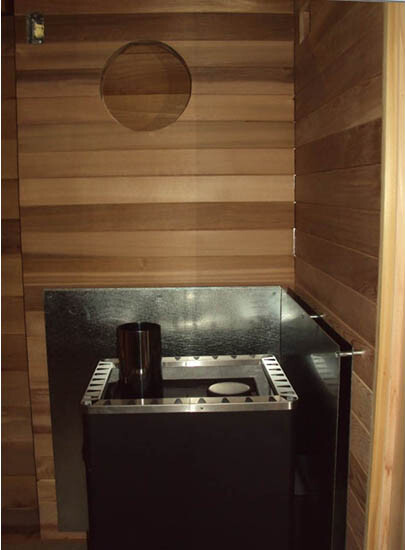
Also worth mentioning here, if you have a ceiling at 6′ 2″ or below, then your ceiling will be a fire hazard. UNLESS you add a protective sheet metal barrier over the ceiling (above the heater). Similar to what you see here behind the heater. Usually, 2 sheets of metal separated by a half inch of spacers or washers.
TIP #7 Tongue and Groove Rows do NOT Align in the Corners
What is the best way to actually put your cedar onto your studs?
Of course FIRST, you will add your sauna foil vapor barrier to the ceiling and four walls. You do not need to add it to the floor as the floor will be cold in any case.
When adding T&G paneling, always start with your ceiling first. Design wise, most people like it when the ceiling boards run in the same direction as the back wall. If you don’t like the direction of your ceiling joists, add 3/4″ nailer boards to change the direction.
The best way to fasten your cedar, paneling tongue and groove paneling to the wall is the start at the bottom. We recommend adding 3/4″ as a gap and a lining boards on each row and leveling as you go. This way all seems will line up in the corners. If you affix all cedar paneling to one wall and the move to the next. Then, do NOT expect it to align with the other rows on the other walls. While, cedar is very soft and forgiving, it is simply not consistent enough to build this way.
Sauna Lumber Calculator. By the way, if you’re looking for an easy way to calculate the lumber required for your sauna walls, use our Sauna Lumber Calculator. Set your wall dimensions, it’ll calculate your sauna board requirements for each wall.
BONUS TIP: In New Construction, Sprinkler Head Rated for 300°F!!
IF your site requires sprinklers to pass code. Do NOT use a normal one rated for 200°F (or less). Saunas at the very top of the ceiling can easily be 200°F or higher. If these go off, it’ll stain your cedar sauna wood forever.
BONUS TIP: Lighting is Too Strong to Relax in the Sauna
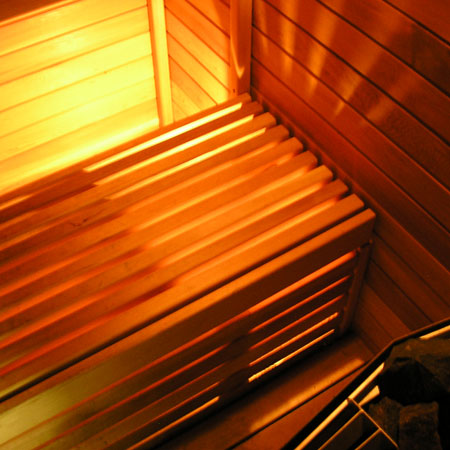
One reason why we enjoy a sauna is to relax. Soft lighting is necessary to fully relax. While a bright light is nice to read. It is not going to help you rest at night. To this point, some actually use red-colored lights for deep relaxation. A bright white light keeps you awake.
Lighting under the benches. We also place lights under benches. This has a great effect at night because the light will shine through the grill of the bench or the facing, and just creates a lovely ambience. Of course, you can also ask your electrician to add a dimmer switch to your lights. Down low you could also use rope lights. The bottom of a sauna is cool and not nearly as hot as the top, so getting heat-rated rope lights will not be necessary for them to last down low. Generally, cheap light only last about 2 to 3 years in most conditions before they
Chromatherapy Lights. Another option is Chromatherapy lights. These lights can alternate among the different common colors of the rainbow including white. Or you can toggle them to one color or another, turn on Pink Floyd and totally relax in the sauna. Enjoy!